Are you ready to take your lash game to the next level? Applying individual eyelash extensions at home might sound intimidating, but trust me, it’s totally doable with the right technique and tools. If you’ve been wondering how to master the art of lash extensions without breaking the bank or visiting a salon, you’ve come to the right place. Today, we’re diving deep into the world of DIY eyelash extensions, breaking it down step by step so you can achieve those gorgeous fluttery lashes right from the comfort of your home.
Before we dive in, let’s address the elephant in the room: applying eyelash extensions at home can seem like a daunting task, especially if you’ve never done it before. But here’s the deal—eyelash extensions aren’t just for professionals anymore. With the right guidance, practice, and patience, anyone can achieve salon-quality results from their own living room. So, buckle up because we’re about to teach you everything you need to know.
Now, if you’ve been searching for “how to apply individual eyelash extensions at home” (and let’s be real, who hasn’t?), this article is your ultimate guide. We’ll cover everything from choosing the right lashes and tools to perfecting your technique. By the end of this, you’ll feel confident enough to give yourself a lash lift that’ll make people ask, “Did you get your lashes done?”
- How Much Does A Baby Black Panther Cost Unveiling The Price Tag And Ethical Concerns
- Black Comedian Tiktok The Hilarious Voices Shaping Social Media
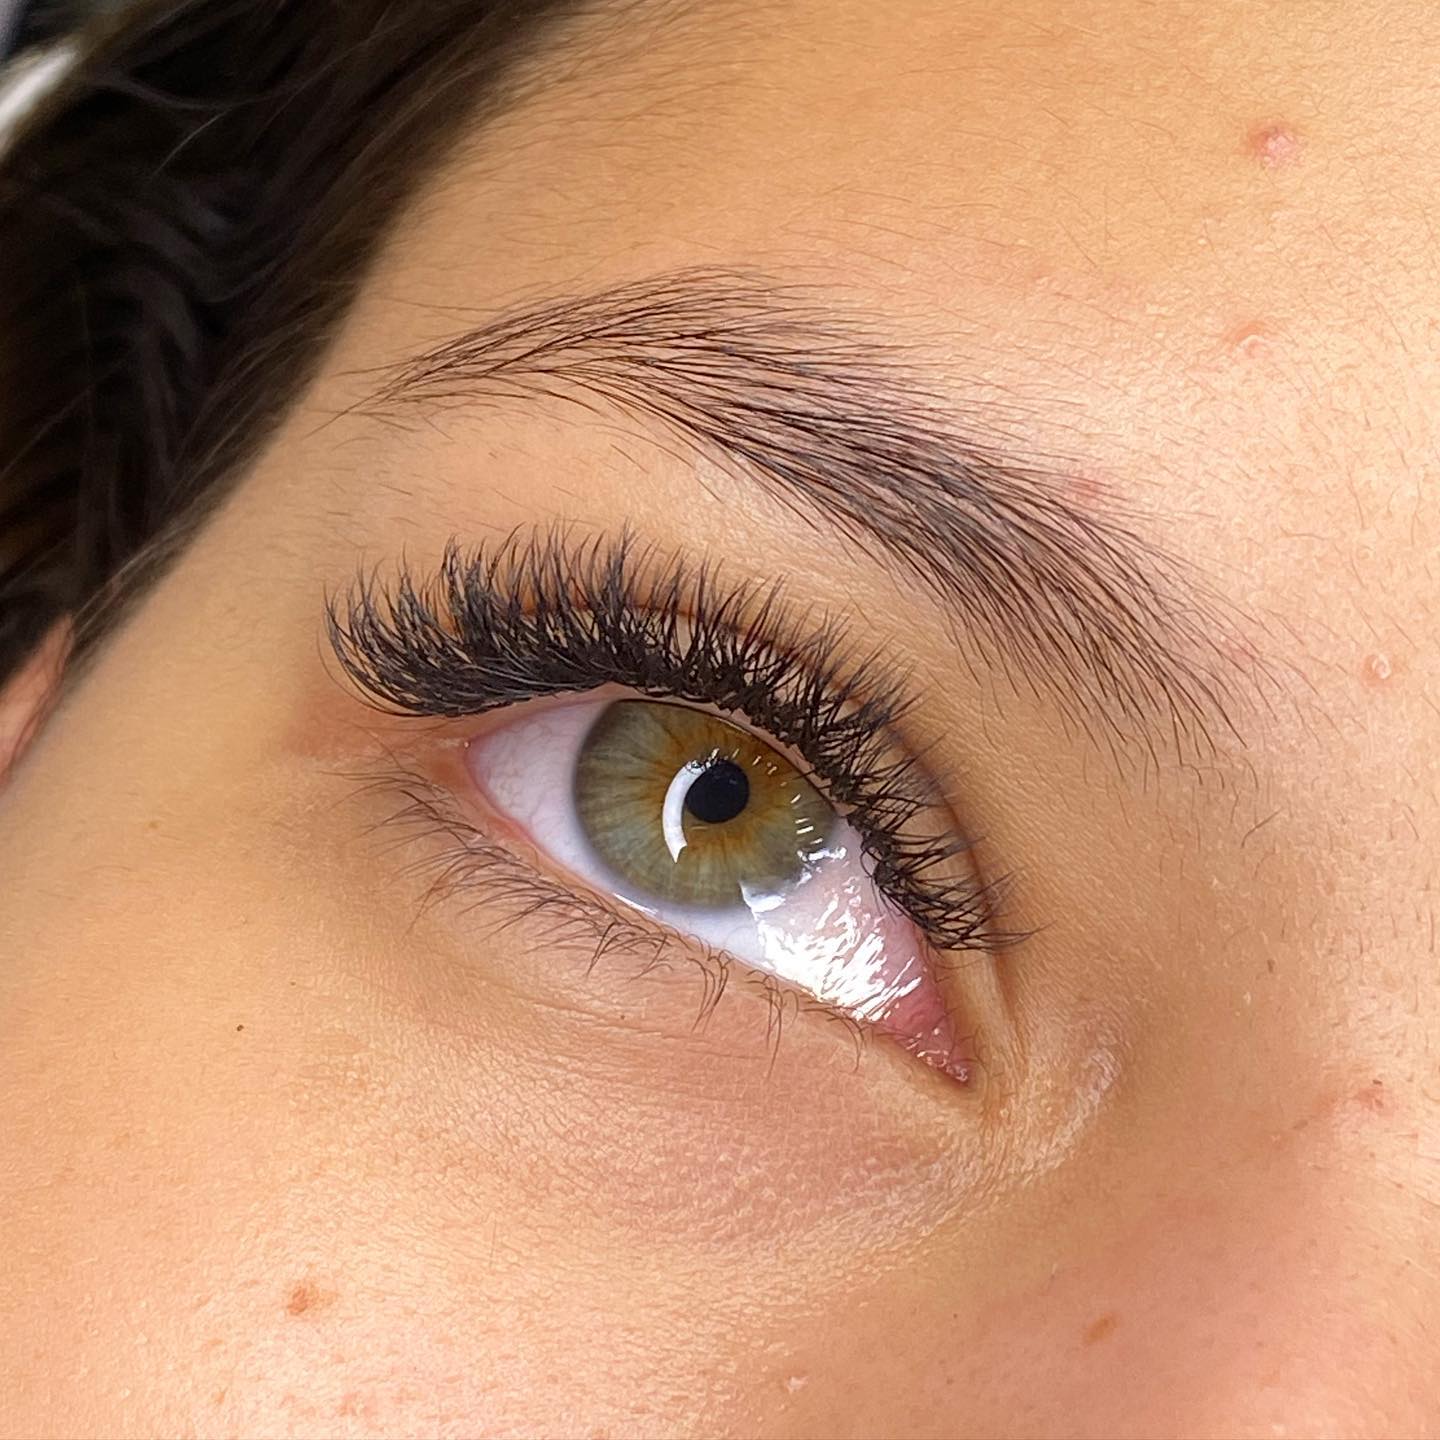
Why Individual Eyelash Extensions Are Worth It
Let’s face it—false lashes can be a bit of a hassle. They fall off after a few wears, and they often don’t look as natural as we’d like. Enter individual eyelash extensions, the holy grail of lash enhancements. These bad boys are applied one by one, creating a look that’s natural, long-lasting, and oh-so-flirty. But why should you bother with them?
- They look way more natural than strip lashes.
- They last longer if applied correctly.
- You can customize the length, curl, and thickness to suit your eye shape.
- It’s a cost-effective alternative to salon visits.
And the best part? You don’t need to be a certified lash artist to try it out. All you need is the right kit and a bit of practice. Trust me, once you get the hang of it, you’ll never go back to those clunky strip lashes again.
Tools You’ll Need for DIY Eyelash Extensions
Before you start your lash journey, you’ll need to gather a few essential tools. Don’t worry, you don’t have to spend a fortune on professional-grade equipment. Here’s what you’ll need:
- Menaklukkan Gaya Rambut Dengan Cortes De Cabelo Untuk Pria Berkulit Gelap
- Bbls Meaning Slang Unlocking The Mystery Behind This Trendy Expression
Essential Tools and Materials
- Individual lash extensions: Choose from mink, silk, or synthetic lashes depending on your preference.
- Lash adhesive: Make sure it’s medical-grade and safe for sensitive eyes.
- Lash tweezers: These are specially designed for precision application.
- Lash primer: Helps clean and prep your natural lashes for better adhesion.
- Spoolie brush: For separating lashes and tidying up after application.
- Mirror: A good, well-lit mirror is a must-have.
Pro tip: Invest in high-quality tools. Cheap tweezers or low-grade adhesive can ruin your experience, so it’s worth splurging a little on the essentials.
Understanding the Different Types of Lashes
Not all lashes are created equal. When it comes to individual eyelash extensions, you have a few options to choose from:
Types of Lashes
Mink lashes: These are the gold standard for lash extensions. They’re lightweight, super soft, and look incredibly natural. However, they tend to be on the pricier side.
Silk lashes: Silk lashes are a great alternative to mink. They’re slightly heavier but still feel luxurious and look fabulous.
Synthetic lashes: If you’re on a budget, synthetic lashes are a great option. They’re affordable and come in a variety of styles, but they might not feel as soft as mink or silk.
When choosing lashes, consider your eye shape, skin sensitivity, and desired look. If you’re a beginner, start with lighter lashes to avoid overwhelming your natural lashes.
Step-by-Step Guide to Applying Eyelash Extensions
Now that you’ve got your tools and lashes ready, it’s time to dive into the application process. Follow these steps carefully, and you’ll be rocking those falsies like a pro in no time.
Step 1: Prep Your Workspace
Start by setting up a clean, well-lit area. Make sure you have all your tools within reach and that your mirror is at the right angle. A clutter-free workspace will help you focus and avoid mistakes.
Step 2: Cleanse and Prep Your Lashes
Use a gentle lash cleanser or primer to remove any dirt, oil, or makeup residue from your natural lashes. This ensures better adhesion and longevity of the extensions.
Step 3: Apply the Adhesive
Squeeze a small amount of lash adhesive onto a non-porous surface, like a ceramic dish. Dip the tip of your tweezers into the adhesive, making sure not to overload it. A little goes a long way!
Step 4: Select and Apply the Lash
Using your tweezers, pick up a single lash extension. Carefully place it at the base of your natural lash, ensuring it’s aligned and secure. Hold it in place for a few seconds to allow the adhesive to set.
Step 5: Repeat and Refine
Continue applying lashes one by one, working your way across your lash line. Take your time and don’t rush the process. Once you’ve finished, use a spoolie brush to separate any clumps and tidy up your look.
Tips for Achieving Professional Results
Here are a few tips to help you achieve that salon-quality look:
- Practice on a friend or family member before trying it on yourself.
- Use a magnifying mirror for better precision.
- Don’t overload your natural lashes with too many extensions—it can damage them.
- Be patient! It takes time to master the technique.
Remember, the key to success is practice. The more you do it, the better you’ll get. And don’t be afraid to experiment with different lengths and curls to find what works best for you.
Common Mistakes to Avoid
Even the pros make mistakes sometimes. Here are a few common pitfalls to watch out for:
- Using too much adhesive, which can cause clumping and make lashes fall out faster.
- Applying lashes too close to the skin, which can irritate your eyes.
- Not cleaning your natural lashes properly, leading to poor adhesion.
- Rushing the process, which can result in uneven placement.
By avoiding these mistakes, you’ll increase your chances of achieving a flawless look every time.
How Long Do DIY Eyelash Extensions Last?
When applied correctly, individual eyelash extensions can last anywhere from two to four weeks. However, the longevity depends on several factors, including:
- How well you care for your lashes.
- The quality of the adhesive and lashes used.
- Your natural lash cycle.
To extend the life of your extensions, avoid rubbing your eyes, use oil-free cleansers, and touch up your lashes every two weeks or so.
Caring for Your DIY Eyelash Extensions
Maintaining your lash extensions is just as important as applying them. Here’s how to keep them looking fresh:
Daily Care Tips
- Wash your lashes gently with a lash cleanser every night.
- Use a spoolie brush to comb through your lashes in the morning.
- Avoid using oil-based makeup remover, as it can break down the adhesive.
Proper care will ensure your lashes stay intact and looking fabulous for weeks.
Is DIY Eyelash Application Safe?
When done correctly, applying eyelash extensions at home is perfectly safe. However, it’s important to use high-quality, hypoallergenic products and follow proper hygiene practices. If you experience any irritation or discomfort, stop using the products immediately and consult a professional.
Final Thoughts
Applying individual eyelash extensions at home might seem like a challenge at first, but with the right tools and techniques, you can achieve stunning results. Remember to take your time, practice regularly, and prioritize safety. And most importantly, have fun with it!
Now that you’ve got all the info, it’s time to put your newfound skills to the test. Share your lash journey with us in the comments below, and don’t forget to tag us in your before-and-after photos. Happy lashing, beauty queens!
Table of Contents
- Why Individual Eyelash Extensions Are Worth It
- Tools You’ll Need for DIY Eyelash Extensions
- Understanding the Different Types of Lashes
- Step-by-Step Guide to Applying Eyelash Extensions
- Tips for Achieving Professional Results
- Common Mistakes to Avoid
- How Long Do DIY Eyelash Extensions Last?
- Caring for Your DIY Eyelash Extensions
- Is DIY Eyelash Application Safe?
- Final Thoughts
- Red And Pink Mixed A Bold Yet Romantic Color Palette
- Which Dior Perfume Smells Best The Ultimate Guide For Fragrance Lovers