Have you ever seen those cheerleaders shaking their pom poms and thought, "I could totally make those myself?" Well, guess what? You can! DIY pom poms cheer is not only a fun and creative activity but also a great way to add some flair to your team spirit or personal style. Whether you're crafting for a school event, a sports game, or just because, making your own pom poms is easier than you think. So, let's dive in and get those creative juices flowing!
There’s something magical about crafting your own pom poms. It’s like giving yourself a little power boost—like, "Hey, I made this, and it’s awesome!" And the best part? You don’t need any fancy tools or expensive materials. With a few simple supplies and some patience, you can create pom poms that’ll make you the star of the squad—or at least the star of your living room cheerleading practice.
Now, I know what you’re thinking: "Can I really pull this off?" The answer is a big fat YES! With this guide, you’ll learn everything you need to know about DIY pom poms cheer, from choosing the right materials to mastering the perfect fluff. So grab your scissors, some yarn, and let’s get started!
- How Much Does A Baby Black Panther Cost Unveiling The Price Tag And Ethical Concerns
- Eeyore Crocs The Coziest Trend Thats Stealing Hearts Worldwide
Why DIY Pom Poms Cheer Matters
Let’s talk about why crafting your own pom poms is such a big deal. First off, it’s a hands-on way to express yourself. Who doesn’t love a personalized touch? Plus, when you make your own pom poms, you get to choose the colors, sizes, and styles that best suit your vibe. Whether you’re all about bold and bright or prefer something more subtle, the possibilities are endless.
Another reason to love DIY pom poms cheer? It’s budget-friendly. Instead of spending a ton of cash on store-bought pom poms, you can create your own for a fraction of the cost. And let’s be real, who doesn’t love saving money while still looking fabulous? Plus, crafting is a great stress reliever, so you’ll be killing two birds with one stone—boosting your team spirit and de-stressing at the same time.
Benefits of Making Your Own Pom Poms
- Personalization: Choose your favorite colors and styles.
- Cost-effective: Save money by making your own instead of buying.
- Creative outlet: Channel your inner artist and get crafty.
- Team spirit: Show off your team pride with custom designs.
What You’ll Need to Get Started
Before we dive into the nitty-gritty of making pom poms, let’s talk about the supplies you’ll need. Don’t worry, it’s not a long list, and most of these items are probably already sitting in your craft box. Here’s what you’ll need:
- How To Say Tamales In Nahuatl A Fascinating Dive Into Indigenous Cuisine And Language
- Is Briana Hampton Still Married The Untold Story Behind Her Relationship
- Yarn (choose colors that match your team or personal style)
- Cardboard or a pom pom maker (optional but super helpful)
- Scissors (sharp ones work best)
- Glue (optional, for added flair)
- Ribbon or string (for attaching to handles or wristbands)
See? Not too complicated, right? Now that you’ve got your supplies ready, let’s move on to the fun part—making your pom poms!
Step-by-Step Guide to Making DIY Pom Poms Cheer
Alright, buckle up because we’re about to get crafty. Follow these simple steps, and you’ll have your very own pom poms in no time.
Step 1: Choose Your Yarn
Pick out the yarn colors that best represent your team or personal style. If you’re cheering for a school team, go with their official colors. If you’re just crafting for fun, go wild and choose whatever makes you happy!
Step 2: Create the Base
If you’re using cardboard, cut out two circles and make a smaller circle in the center of each. If you’re using a pom pom maker, you’re already good to go. These tools are designed to make the process easier, so they’re worth investing in if you plan on making a lot of pom poms.
Step 3: Wrap the Yarn
Take your yarn and start wrapping it around the cardboard or pom pom maker. The more yarn you use, the fuller your pom pom will be. Keep wrapping until you’ve got a nice, thick layer.
Step 4: Tie It Off
Once you’ve wrapped enough yarn, cut it off and tie a separate piece of yarn tightly around the middle. Make sure it’s secure—you don’t want your pom pom falling apart halfway through a cheer!
Step 5: Cut the Yarn
Now comes the exciting part! Carefully cut the yarn along the edges of the cardboard or pom pom maker. Be gentle—this is where precision matters. Once you’ve cut all the way around, you’ll have a fluffy little pom pom.
Step 6: Fluff and Trim
Gently fluff out your pom pom to give it that perfect shape. If it looks a little uneven, don’t worry—you can trim it with scissors until it’s just right. And voilà! You’ve got yourself a beautiful DIY pom pom.
Choosing the Right Materials
Not all yarn is created equal, so it’s important to choose the right kind for your DIY pom poms cheer. Look for yarn that’s soft, fluffy, and easy to work with. Acrylic yarn is a popular choice because it’s affordable and comes in a wide range of colors. If you want something a little more luxurious, consider using wool or mohair yarn for an extra fluffy effect.
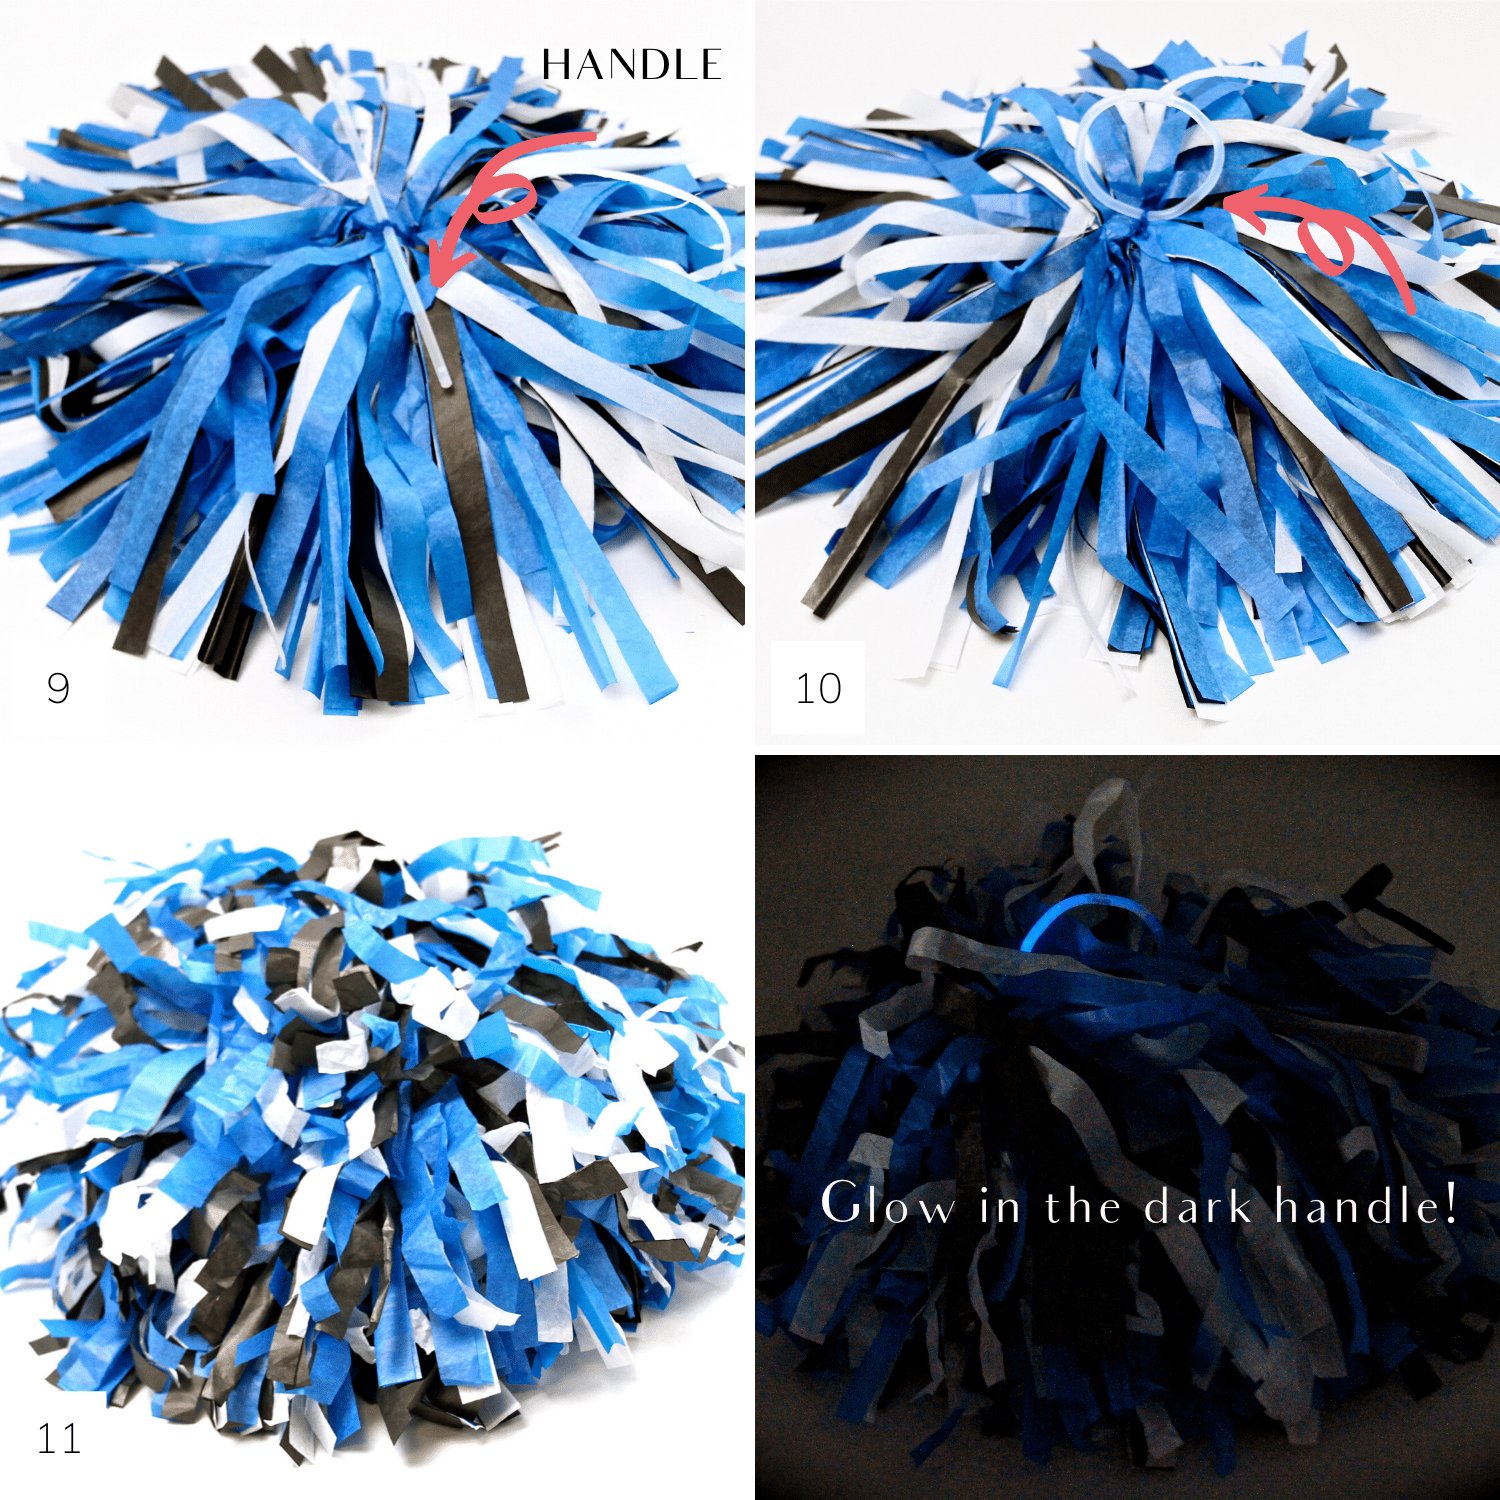
When it comes to handles, you’ve got a few options. You can use wooden dowels, PVC pipes, or even recycled materials like old rulers or paint stirrers. The key is to choose something sturdy enough to hold up during a cheer but light enough to carry comfortably.
Customizing Your Pom Poms
Now that you’ve got the basics down, let’s talk about customization. This is where you can really let your creativity shine. Here are a few ideas to take your DIY pom poms cheer to the next level:
- Add glitter or sequins for some extra sparkle.
- Use ribbons or bows to create a unique handle design.
- Experiment with different sizes and shapes for variety.
- Attach small charms or beads for a personalized touch.
Don’t be afraid to mix and match materials and styles to create something truly one-of-a-kind. After all, your pom poms should reflect your personality and passion for cheering!
Tips for Perfect Pom Poms
Here are a few tips to help you create the perfect DIY pom poms cheer:
- Use a ruler to ensure your pom poms are the same size.
- Work on a flat surface to avoid tangled yarn.
- Keep a small brush handy for fluffing and shaping.
- Test your pom poms before the big day to make sure they hold up.
These simple tricks will help you avoid common mistakes and ensure your pom poms look fantastic every time.
Common Mistakes to Avoid
Even the best crafters make mistakes sometimes, but here are a few to watch out for:
- Not using enough yarn, which can result in flat or sparse pom poms.
- Tying the center too loosely, causing the pom pom to fall apart.
- Cutting the yarn too aggressively, which can lead to uneven edges.
By being mindful of these potential pitfalls, you’ll be well on your way to crafting perfect pom poms every time.
Where to Find Inspiration
Need a little inspiration for your DIY pom poms cheer? Look no further than social media platforms like Pinterest and Instagram. These sites are full of amazing ideas and tutorials to help you take your crafting to the next level. You can also check out crafting blogs and YouTube channels for step-by-step guides and expert tips.
And don’t forget to join online communities of fellow crafters. These groups are a great place to share your creations, ask for advice, and get feedback from others who share your passion for crafting.
Conclusion: Your Turn to Cheer
There you have it—everything you need to know about DIY pom poms cheer. From choosing the right materials to customizing your designs, you’ve got all the tools and knowledge to create something truly special. So go ahead and get crafting, and don’t forget to show off your hard work when you hit the field—or the living room.
And remember, crafting is all about having fun and expressing yourself. Whether you’re cheering for a team or just cheering for yourself, your pom poms should reflect your unique style and personality. So shake it off, get those pom poms fluffing, and let your inner cheerleader shine!
Now it’s your turn. Share your creations with us in the comments below, or tag us on social media so we can see your amazing pom poms. And don’t forget to check out our other articles for more crafting tips and tricks. Happy cheering!
Table of Contents
- DIY Pom Poms Cheer: Your Ultimate Guide to Crafting and Cheering Like a Pro
- Why DIY Pom Poms Cheer Matters
- Benefits of Making Your Own Pom Poms
- What You’ll Need to Get Started
- Step-by-Step Guide to Making DIY Pom Poms Cheer
- Choosing the Right Materials
- Customizing Your Pom Poms
- Tips for Perfect Pom Poms
- Common Mistakes to Avoid
- Where to Find Inspiration
- Conclusion: Your Turn to Cheer
- How To Breathe Properly During Hip Thrust A Comprehensive Guide
- Unveiling The Secrets Of Motel Nikuniwe A Unique Experience