So here’s the deal, drawing an orange might seem like a piece of cake—literally—but trust me, it’s a skill that takes practice. Whether you're a beginner or someone looking to refine their technique, mastering how to draw an orange can be both fun and rewarding. In this guide, we’re diving deep into the world of sketching this juicy citrus fruit. Let’s get started, shall we? and oh, drawing an orange is more than just shapes—it’s about bringing life to the canvas.
Think about it—what makes an orange so captivating? Its vibrant color, the texture of its skin, and the way light plays on its surface. When you sit down to draw an orange, you're not just replicating a fruit; you're capturing its essence. This guide will walk you through every step, from understanding the basics to adding those final touches that make your drawing pop. So grab your pencils, and let’s go!
Before we dive into the nitty-gritty, it’s worth mentioning that learning to draw an orange isn’t just about the fruit itself. It’s about honing your observational skills, understanding light and shadow, and mastering texture. These are fundamental skills that will help you in any drawing project, no matter what you’re sketching. So, ready to level up your art game? let’s do this!
- How To Remove The Tiktok Algorithm A Comprehensive Guide
- Aguachile De Camaroacuten Rojo The Ultimate Guide To This Fiery Mexican Delicacy
Why Drawing an Orange Matters
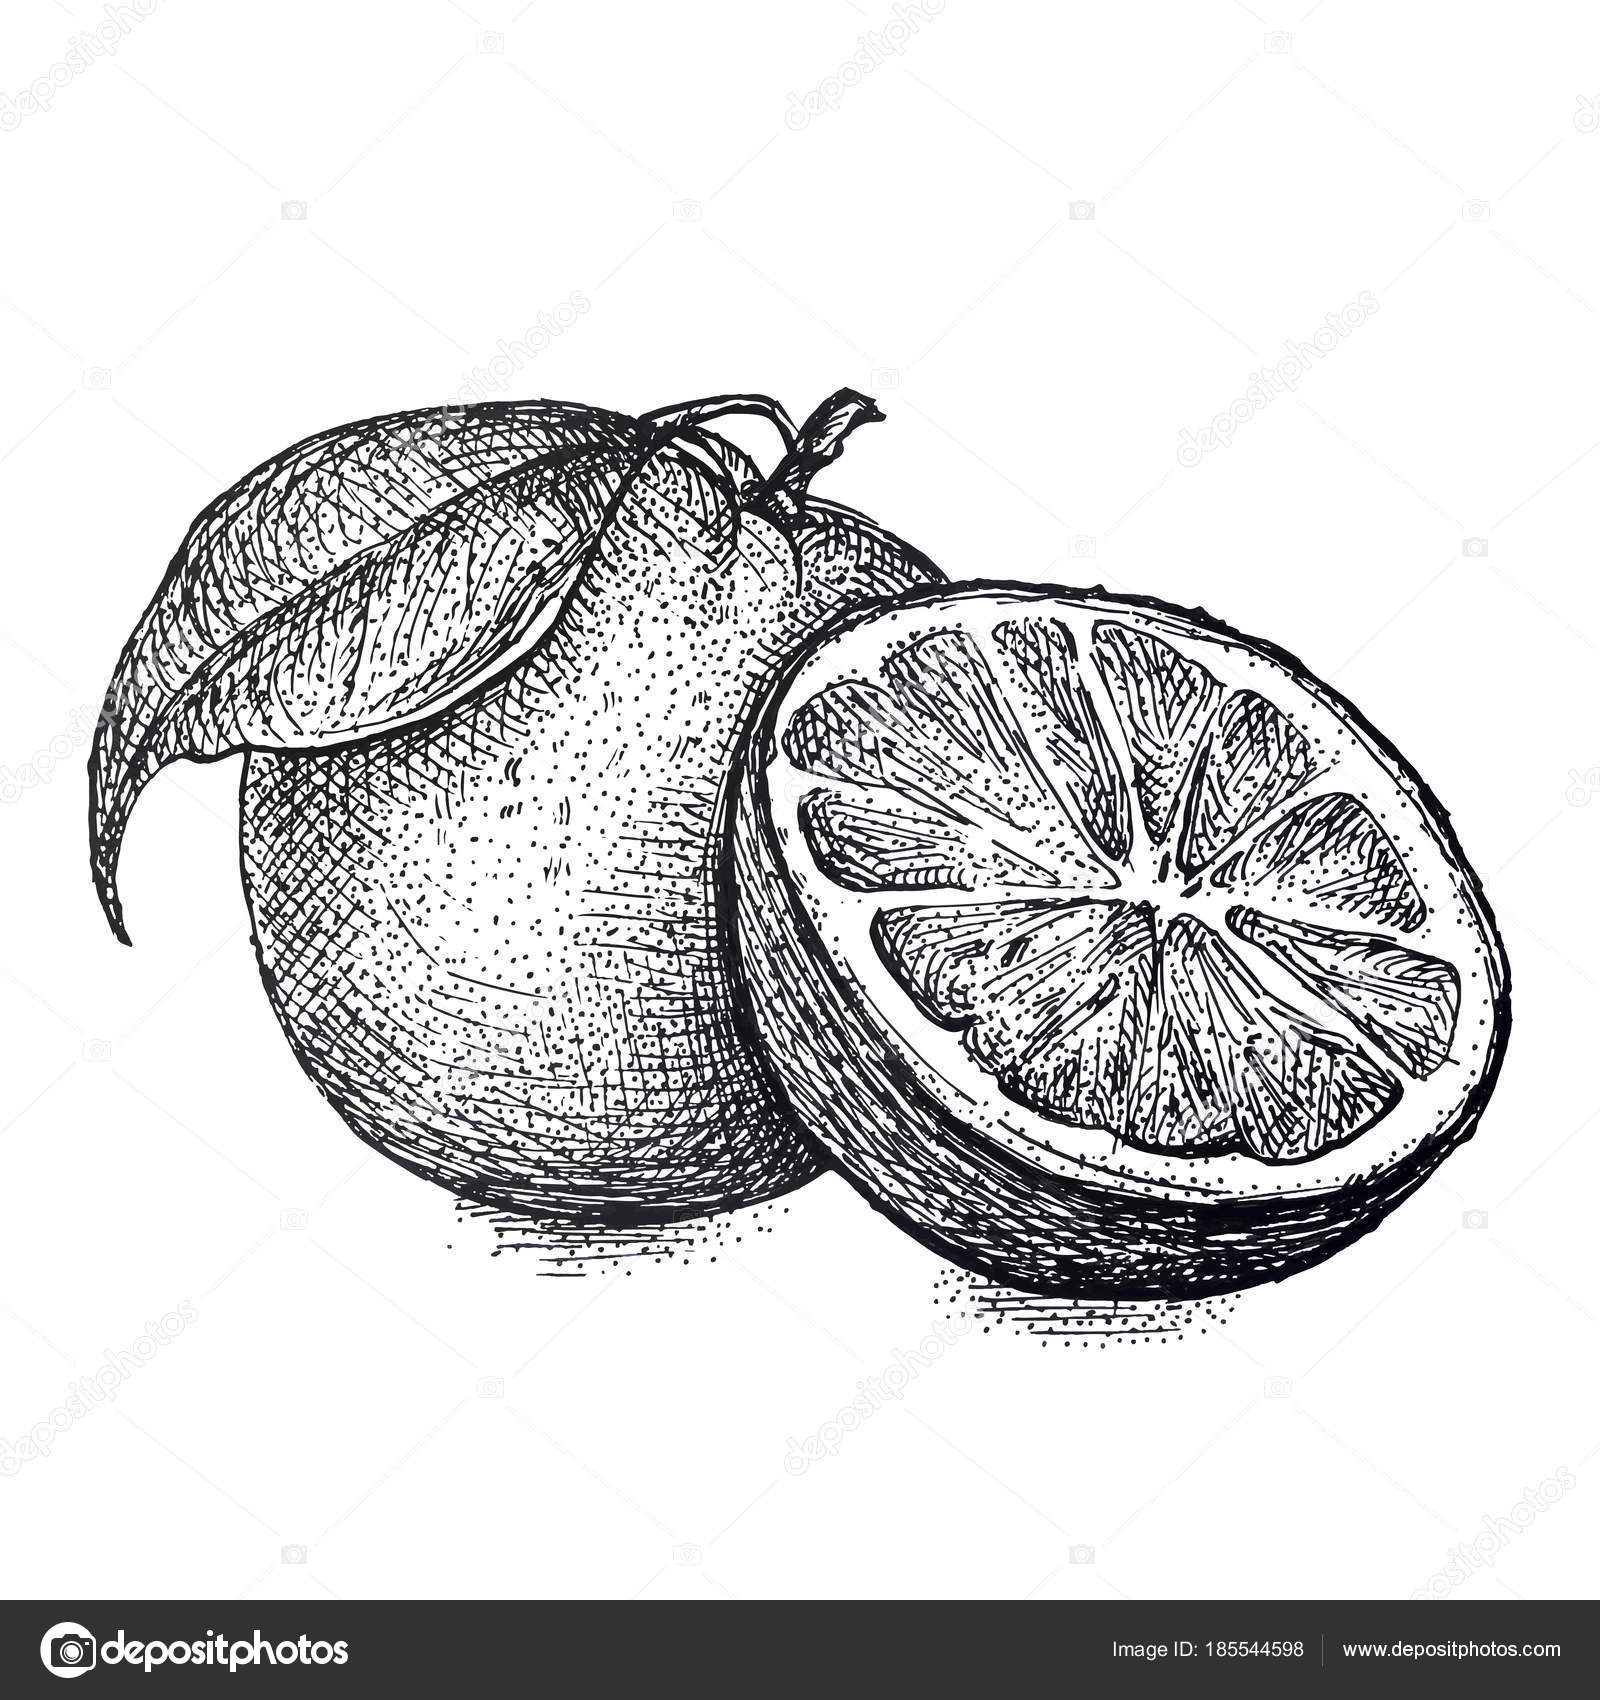
Alright, let’s talk about why drawing an orange is such a big deal. It might seem simple, but this little citrus fruit is actually a great subject for practicing several key artistic skills. First off, it’s all about shape. Oranges are round, but not perfectly spherical. They have a unique texture that adds depth to your drawing. Plus, the way light interacts with the surface of an orange can teach you a lot about shading and highlights. drawing an orange isn’t just about copying what you see; it’s about understanding how to translate 3D objects onto a 2D surface.
Understanding the Shape of an Orange
Let’s break it down. Oranges aren’t perfect circles—they’ve got a bit of a bump here and there. When you’re drawing an orange, pay attention to these subtle imperfections. They’re what make your drawing look realistic. Start with a basic circle, but don’t be afraid to add a few wiggles to mimic the natural irregularities of an orange’s shape. It’s these tiny details that bring your drawing to life.
Tools You’ll Need for Drawing an Orange
Before we jump into the drawing process, let’s talk about what you’ll need. First up, pencils. I recommend starting with a basic HB pencil for sketching the outline, then moving on to darker pencils like 2B or 4B for shading. You’ll also want some good quality paper—nothing too rough, but nothing too smooth either. A kneaded eraser is a must-have for fixing mistakes and creating highlights. Oh, and don’t forget a blending stump if you want to smooth out your shading.
- Yao Shaq The Rise Of A Phenomenal Basketball Legend
- Coyotes Laughing The Mystery Behind Their Chilling Howls And Giggles
Choosing the Right Paper
Paper choice is crucial when it comes to drawing an orange. You want something that can handle graphite without tearing. A medium-weight paper with a slight tooth is ideal. It allows the pencil to glide smoothly while still giving you enough texture to create those subtle shadows and highlights. Trust me, the right paper can make a huge difference in how your drawing turns out.
Step-by-Step Guide to Drawing an Orange
Now that you’ve got your tools ready, let’s dive into the step-by-step process of drawing an orange. This isn’t just about following instructions—it’s about understanding the process and making it your own. So, let’s get sketching!
Step 1: Sketch the Basic Shape
Start by lightly sketching a circle. Remember, it doesn’t have to be perfect. Oranges are naturally a bit lumpy, so embrace those imperfections. Use a light touch with your pencil so you can easily erase any mistakes later on. This is your foundation, so take your time to get it right.
Step 2: Add Texture
Once you’ve got the basic shape down, it’s time to add some texture. Oranges have a bumpy surface, so use short, light strokes to mimic this texture. Don’t overdo it—just enough to give the illusion of depth. This is where your observational skills come into play. Look closely at the orange you’re drawing from and try to replicate those tiny bumps and grooves.
Step 3: Work on Shading
Shading is where the magic happens. Start by identifying where the light source is coming from. This will determine where your highlights and shadows go. Use a darker pencil to add shading to the areas where the light doesn’t hit. Gradually blend the shading into lighter areas using a blending stump. This creates a smooth transition and gives your orange a realistic look.
Step 4: Create Highlights
Highlights are what make your drawing pop. Use your kneaded eraser to gently lift off some graphite in the areas where the light hits the orange. This creates bright spots that mimic the shine on the fruit’s surface. Be careful not to overdo it—you want the highlights to look natural, not overly done.
Tips for Drawing an Orange
Here are a few tips to help you take your orange drawing to the next level. First, always start with a light touch. It’s easier to add more detail than it is to erase mistakes. Second, don’t be afraid to experiment with different shading techniques. Cross-hatching, stippling, and blending can all add unique textures to your drawing. And finally, practice, practice, practice. The more you draw, the better you’ll get.
Experimenting with Colors
If you’re feeling adventurous, try adding color to your orange drawing. Start with a base layer of orange, then layer on darker shades to create depth. You can also add a bit of yellow for highlights and a touch of brown for shadows. Just like with shading, take your time and build up the layers gradually. This will give your orange a rich, vibrant look.
Common Mistakes to Avoid
Even the best artists make mistakes, but there are a few common ones to watch out for when drawing an orange. One big one is making the shape too perfect. Remember, oranges aren’t perfect circles—they’ve got bumps and grooves that make them unique. Another mistake is overdoing the shading. Too much shadow can make your orange look flat instead of round. And finally, don’t forget the highlights! They’re what give your drawing that extra bit of realism.
How to Fix Mistakes
Mistakes happen, but the good news is they’re easy to fix. If you’ve made a mistake with your outline, use a kneaded eraser to gently lift off the graphite. For shading mistakes, you can use a blending stump to smooth out the area and make it look more natural. And if you’ve overdone the highlights, just add a bit more shading around the edges to balance it out.
Advanced Techniques for Drawing an Orange
Once you’ve mastered the basics, it’s time to try some advanced techniques. One great technique is using cross-hatching to create texture. This involves drawing intersecting lines to create a pattern that mimics the bumpy surface of an orange. Another technique is stippling, where you use tiny dots to create shading and texture. These techniques take practice, but they can add a lot of depth to your drawing.
Adding a Background
Don’t forget about the background! Adding a simple background can really enhance your orange drawing. You can use shading techniques to create a gradient effect, or you can add a few simple elements like leaves or a tablecloth. Just make sure the background doesn’t overpower the orange—it’s the star of the show, after all.
Conclusion: Keep Practicing and Have Fun
So there you have it—a comprehensive guide to drawing an orange. Remember, practice makes perfect. The more you draw, the better you’ll get at capturing the unique characteristics of this juicy fruit. And most importantly, have fun with it! Drawing is all about expressing yourself and exploring your creativity. So grab your pencils, pick up an orange, and start sketching. And don’t forget to share your masterpiece with the world!
Oh, and one last thing—if you’ve enjoyed this guide, be sure to check out our other articles on art techniques and tips. Who knows? Maybe your next masterpiece will be just around the corner.
Table of Contents
- Why Drawing an Orange Matters
- Understanding the Shape of an Orange
- Tools You’ll Need for Drawing an Orange
- Choosing the Right Paper
- Step-by-Step Guide to Drawing an Orange
- Step 1: Sketch the Basic Shape
- Step 2: Add Texture
- Step 3: Work on Shading
- Step 4: Create Highlights
- Tips for Drawing an Orange
- Experimenting with Colors
- Common Mistakes to Avoid
- How to Fix Mistakes
- Advanced Techniques for Drawing an Orange
- Adding a Background
- Corte Tlacuache The Ultimate Guide To Discovering This Unique Mexican Tradition
- Water Park Bikini Malfunctions The Ultimate Guide To Stay Cool And Covered